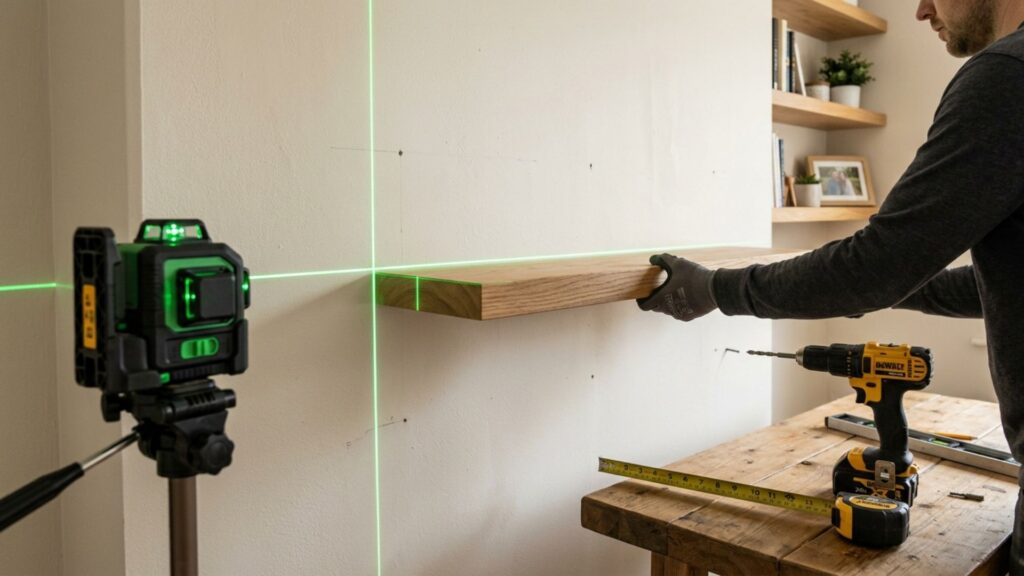
Putting up a shelf is one of the most satisfying DIY jobs there is, right up until you step back and spot it sloping. The good news is that a perfectly straight shelf isn't about a steady hand. It's about knowing your wall, marking a proper level line and using the right fixings.
This beginner's guide walks you through it step by step, from working out what your wall is made of and checking for hidden cables and pipes, to drilling clean holes and fitting the shelf so it stays put. No trade experience needed.
Quick answer: how do you put up a shelf straight?
Find out your wall type, check for cables and pipes with a detector, then mark a level line with a spirit level or laser level rather than measuring up from the floor. Mark your holes through the bracket, drill with the right bit, use the correct wall plugs or fixings, and check the level again before you load the shelf.
What you'll need
- Your shelf and brackets (or a floating shelf kit)
- Tape measure and pencil
- Spirit level or cross-line laser level
- Cable and pipe detector
- Cordless drill with the right bits (masonry for brick or block, wood or HSS for timber)
- Wall plugs or plasterboard fixings to suit your wall, and screws
- Screwdriver, safety glasses and a vacuum for the dust
Step 1: work out what your wall is made of
This matters more than anything else, because it decides which fixings you need. Knock on the wall:
- Hollow sound: probably plasterboard on a timber or metal frame. Use plasterboard fixings, or better still, screw into the timber studs for anything heavy.
- Solid, dull sound: probably brick or block behind plaster. Use a masonry bit and standard wall plugs.
- Older homes: lath and plaster or crumbly brick can be unpredictable. Take it slowly and consider larger fixings.
Check the weight rating on your fixings and brackets. A shelf of books is much heavier than you think.
Step 2: check for cables and pipes
Never skip this. Run a cable and pipe detector over the whole area where you plan to drill. Cables usually run vertically or horizontally from sockets and switches, so avoid drilling directly above, below or beside them. Pipes can turn up almost anywhere, especially near radiators, bathrooms and kitchens. If the detector beeps, move the shelf.
Step 3: mark a level line
Here's the mistake most beginners make: measuring up from the floor or down from the ceiling. Floors and ceilings are rarely perfectly level, so your shelf will copy their slope. Instead:
- Measure up to the height you want at one end and make a small pencil mark.
- Hold your spirit level on the mark, adjust until the bubble is centred, and draw a light line along the top edge.
- For long shelves or several shelves in a row, a cross-line laser level projects a perfectly straight line across the wall, so you can mark every bracket at once.
📐
Bosch Cross-Line Laser Level
Hang shelves and frames perfectly straight, first time.
Step 4: drill and fix the brackets
- Hold the first bracket on your line and mark the screw holes through it with a pencil.
- Put on safety glasses. Wrap a bit of masking tape round the drill bit to mark the depth of your wall plug.
- Drill straight and steady. For masonry, use hammer mode; for plasterboard, turn it off.
- Vacuum out the dust, push in the wall plugs until they're flush, and screw the bracket on loosely.
- Check it's level, tighten up, then repeat for the second bracket, using your level line and the level itself to line them up.
Step 5: fit the shelf and check again
Rest the shelf on the brackets and put your level on top before you fix it in place. If it's slightly out, you can usually loosen one bracket and nudge it. Once you're happy, secure the shelf to the brackets with short screws so it can't slide or tip. Then load it gradually rather than piling everything on at once.
Common mistakes to avoid
- Trusting the floor or ceiling instead of a level.
- Using the wrong fixings – standard plugs in plasterboard will pull out under load.
- Drilling too close to the edge of a wall or alcove, where plaster and brick can crumble.
- Overloading floating shelves – check the stated weight limit, as they hold less than bracketed shelves.
- Rushing the measuring – measure twice, drill once.
Get these right and your shelf will be straight, solid and safe for years.
Putting up shelves FAQs
How high should I put a shelf?
There's no fixed rule. Around eye level suits display shelves, while shelves above a desk or worktop need enough clearance for whatever sits underneath. Mark the height with masking tape first and live with it for a day.
Can I put a shelf on plasterboard?
Yes, for light loads with proper plasterboard fixings. For anything heavy, find the timber studs with a stud detector and screw into those.
Spirit level or laser level?
A spirit level is all you need for one shelf. A laser level is faster and more accurate for several shelves, long runs or gallery walls.
Do I need a hammer drill?
Only for brick, block or stone walls. For plasterboard and timber, a standard drill driver is fine and less likely to damage the wall.
The verdict
Putting up shelves straight comes down to preparation: know your wall, check for cables and pipes, mark a true level line and use fixings that suit the load. A good level does most of the hard work, and a cross-line laser level makes it almost foolproof. Take your time, wear eye protection and your first shelf will look like a pro fitted it.
As an Amazon Associate, LookFindBuy earns from qualifying purchases. DIY advice is general guidance. If you're unsure about your wall or what's behind it, ask a qualified tradesperson.